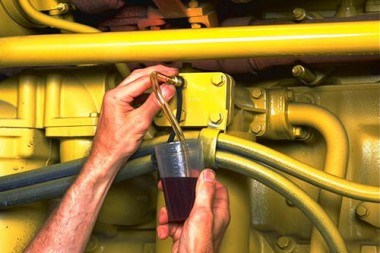
 Using an Oil Valve Probe
This sampling method requires a Brass Probe (Cat # 8T9208) and approximately 15 cm (6 in) of (Cat # 6K0713 or 5P6442 bulk cut to length) tubing. Some sample kits may already come with a disposable probe and tubing assembly if designed for “live” sampling method.
If you are sampling several compartments, begin with the cleaner systems-usually the hydraulic system, then the transmission or steering system, and finally the engine system.
Use a new piece of tubing for each machine or engine. It is especially important to discard the tubing after sampling engine oil because soot and oil additives may remain in the tubing and contaminate other samples.
Step ASet the engine at low idle and remove the dust cap from the valve of the compartment you are sampling. | |
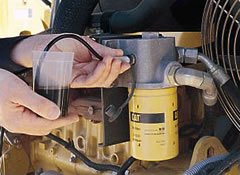
Step BInsert the probe into the valve and collect about 100 ml (4 fl oz) of oil into a waste container. If the oil flow is slow at low idle, it may be necessary to have someone accelerate the engine to high idle while extracting the sample. Dispose of the waste oil properly. (This process cleans the valve and helps ensure a representative sample.) | |
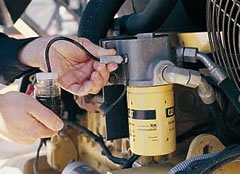
Step CInsert the probe into the valve again and fill the sample bottle three-quarters full-do not fill to the top. Do not allow any dirt to enter the bottle or bottle cap. | |
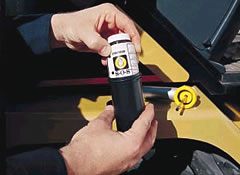
Step DWithdraw the probe from the valve and secure the bottle cap. Then place the bottle with the completed label into the shipping cylinder. |
Install oil sampling valves
MAKING IT EASIER
Most current Caterpillar engines and machine models are equipped with sample valves for pressurized oil compartments. Some engines and machines may not have these valves, but it is easy and inexpensive to add them.
It is important to install valves in the correct location in each system and to avoid contaminating the system during installation. We can help you with specific installation procedures.
Use a tube cutting device
Cutting tubing with a pocket knife is difficult-and it allows particles that can contaminate your sample into the tubing. To avoid these problems, we recommend the tube cutter (1U7648), which allows you to make a quick, clean cut with just one hand. Replacement blades for the Tube Cutter are also available.
Keep sampling supplies clean
Keep new, empty oil bottles capped and store bottles and tubing in a dust-free plastic bags. The vacuum pump and brass valve pro be should also be protected from dust. If you feel a sample is contaminated, discard it and take another.
AVOIDING CONTAMINATION
To avoid contamination, do not take samples from the drain stream, a waste oil container, or used filter.
Using a Sampling Gun
This sampling method requires a Vacuum Pump (1U5718 or equivalent). Use this method for pressurized systems not equipped with sampling valves.
Again, it is important to use a new piece of tubing after sampling engine oil because soot and oil additives may remain in the tubing and contaminate other samples.
Using vacuum extraction
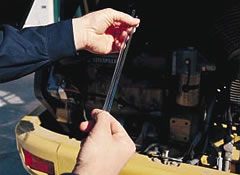
Step ATurn the engine off. Measure and cut new tubing to the length of the dipstick. If the compartment you are sampling does not have a dipstick, cut the tubing so that it reaches about halfway into the oil depth. | |
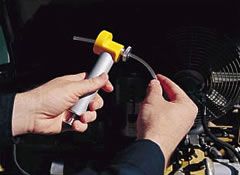
Step BInsert the tubing through the head of the vacuum pump and tighten the retaining nut. The tubing should extend about 4 cm (1 in) beyond the base of the vacuum pump head. | |
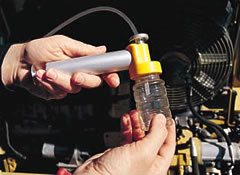
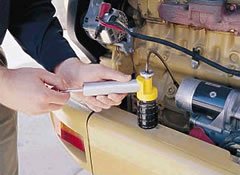
Step CInstall a new sampling bottle onto the vacuum pump and insert the end of the tubing into the oil-do not allow the tubing to touch the bottom of the compartment. | |
Step DPump the vacuum pump handle to create a vacuum. Hold the pump upright-if you turn it over, oil may contaminate the pump. If oil enters the pump, disassemble and clean it before taking the sample. Fill the bottle three-quarters full-do not fill to the top. | |
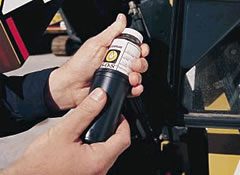
Step EWithdraw the tubing from the compartment. Remove the bottle from the vacuum pump and secure the cap on the bottle. Then place the bottle with the completed label into the shipping cylinder. |
Fill out sample label completely. ENSURING ACCURATE RESULTS
To ensure accurate sample results, supply all of the information requested for each machine compartment.
Model, serial number, and service meter units on both equipment and oil are vary important. If necessary, you can obtain oil type and classification information and the meter reading of your last oil change from the shop records. It is also critical to indicate whether or not you changed the oil when you took the sample.
New oil samples are necessary for oil condition analysis. When you receive a new brand or shipment of bulk oil, submit a sample and indicate on the label the brand, type, and classification of the oil.
Fill out sample label information before you begin taking samples to keep the label oil-free and easy to read.
USING SEPARATE PUMPS
DO NOT use the vacuum pump used to extract oil samples to take engine coolant samples. Although the fluid does not enter the barrel of the pump, glycol residue from a coolant sample can cause a “false positive” in oil samples taken later with the same pump. Designate a separate pump for coolant samples.

